So sanding has gone on forever but there has been plenty going on around it.
 |
| Wish I had filled the staple holes before I started sanding. |
The transmission; I have finally sold the transmission I have, and whats more I got exactly what I paid for it minus "TradeMe" fees. TradeMe is like eBay only way more popular here in NZ. The money from this has financed various directions recently.
Stain; so I got some test pots, and then cleaned up a couple of left over bits of veneer. I stained these and left them to dry. I wasn't particularly impressed with results. I then coated them in penetrating epoxy and that made them look a bit better. Finally I coated one piece in fibreglass. This piece had stripes, a strip of one colour, a plain unstained stripe and then the other colour. By the time I had fibreglassed it I had made my mind up. No stain.
Fibreglassing, so as I mentioned above I fibreglassed a scrap of veneer as part of my stains testing. Regretablly this I think made me a little over confident. Fibreglassing this small piece was very easy and came out exaclty like the books / video's etc said it should.
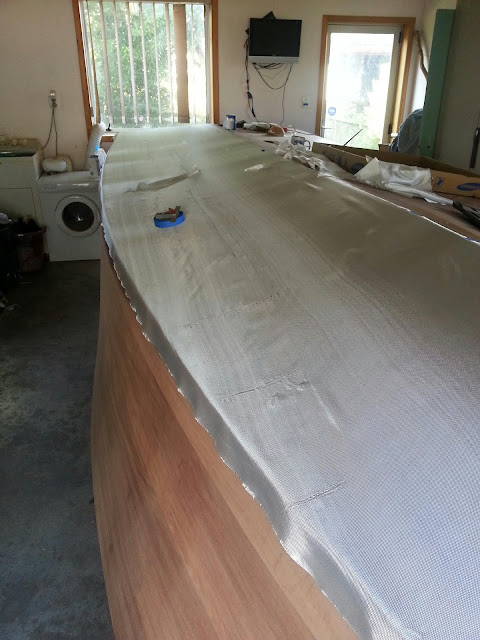 So I prepared one side of the bottom for glassing and got stuck in. It started out well, but to be honest didn't end well. I made several mistakes, one of which was using fast harder instead of slow. The temperature at the time was below the minimum for the slow hardener as per the data sheet, but the fast just went off plain to fast.
Also I used rollers, which seems to push the cloth rather than push the epoxy into the cloth, and lastly I tried to do it all myself. So the end result, the first 3rd looks pretty good, but it get progressivly more ugly as you progress to the stern. I had lumps of epoxy go off underneath the cloth, not big ones but enough to produce definelty lumps in the surface.
So learning from my mistakes, and talking to a couple of guys at work I changed my tactics. I used slow hardener, I used a 6" squeege, and I enlisted my daughter as cheif epoxy mixer. What a huge differnce, the other side of the bottom went very easily, with minimal stress and has come out looking exactly like the books / videos / pictures suggest it should.
So my job for next week is to re-assess the first side and decide whether it is workable or whether it has to come off.
Sanding, well that is finished now, well wood sanding, I have plenty of epoxy resin sanding ahead of me. The job seemed to go on forever, and I made a few goofs in the early stages using the disc sander, but like most things on this boat building journey you learn from your mistakes, and proceed. I am quite certain its not as good as many of the boats on the Glen-L forum, but it aint half bad either.
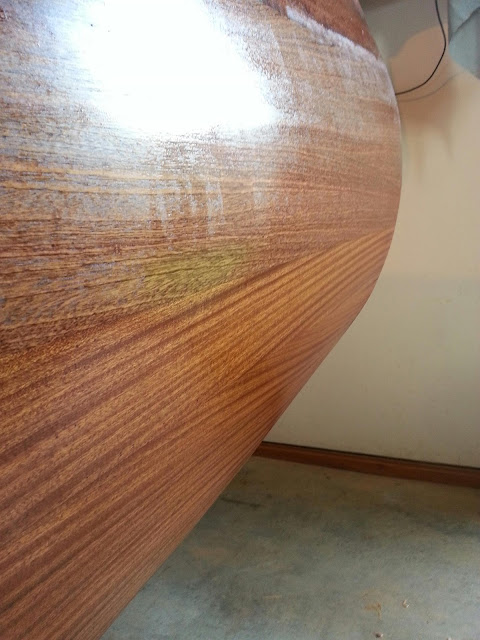
So far I have now coated one side with penetrating epoxy and to my eyes anyway it looked beautiful.
The plan,
A bit of sanding and then I can apply the 2nd and 3rd coats of epoxy.
A bit of sanding and I can apply penetrating epxoy to the other side and transom.
Under coat the bottom.
A couple of coats minimum of varnish on the sides.
Final coat on the bottom.
Then the flip, which at this stage I am hoping to achieve before the end of september, if not sooner.
In between the above I hope to get the engine started and of course I have to build a cradle for the boat to sit on.


